Shabby Miss Jenn

Wednesday, January 16, 2013

The Very Hungry Caterpillar Party


Here is a VERY late summary of the Very Hungry Caterpillar party I did for Hayden's and Rylan's  joint birthday party last April.  It was so fun to plan and the party went perfectly!  I will try to give as much info as possible for others out there...because I got so much help and inspiration from so many other bloggers out there!  You can check out my Caterpillar Pinterest Board Here.

Here's in the invite I made!  It turned out super cute...I found the graphics from the Polka-dots & Puppies blog.  She some how created all sorts of caterpillar PNG files free for download.  HERE is a link to her FREE DOWNLOAD.  Or if you would like I am always available to create your custom invite!


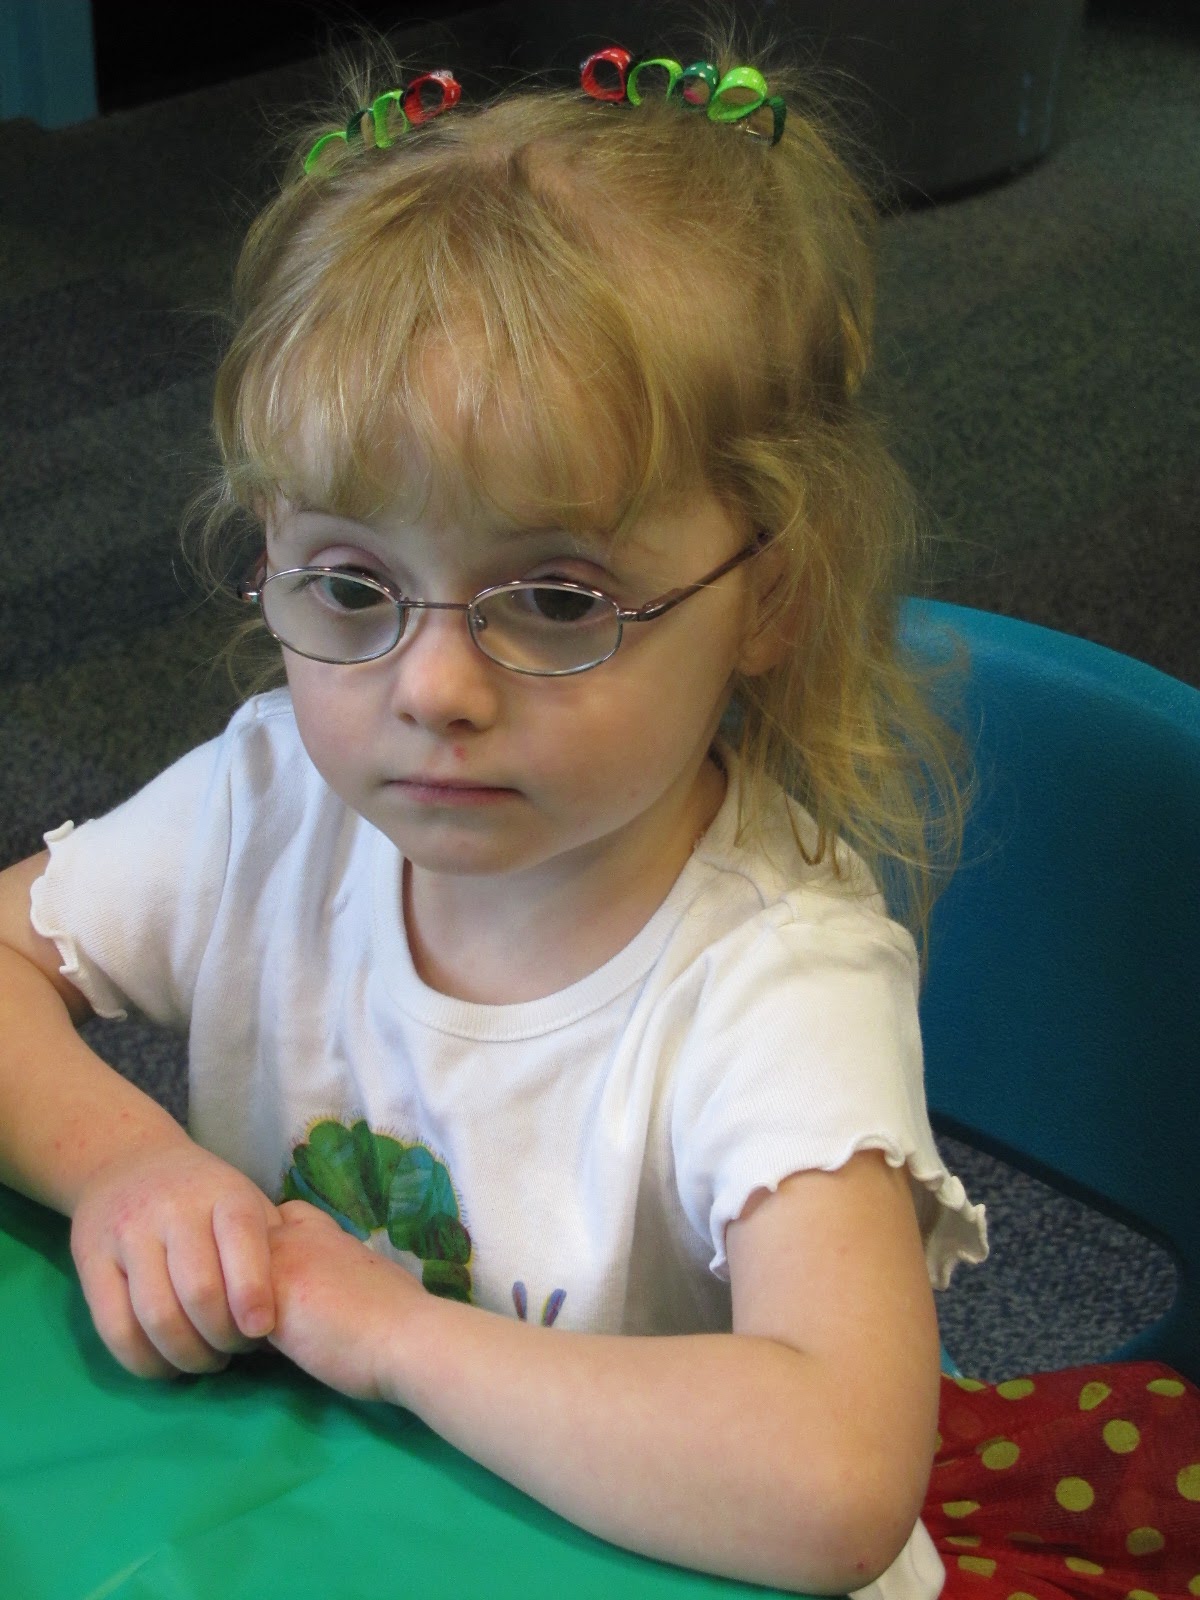
These sweet little caterpillar barrettes were made by my friend Jen who runs CraftBarn.  They even have TINY little googly eyes!  Each girl got a set of these in their little gift box.


The boys got these necklaces...I got the large beads from this seller on EBAY.  The beads area bout an inch in diameter...though the beads are still in the choking hazard range...they would be much more noticeable if the little one had gotten on in their mouth! No body did so that is good!
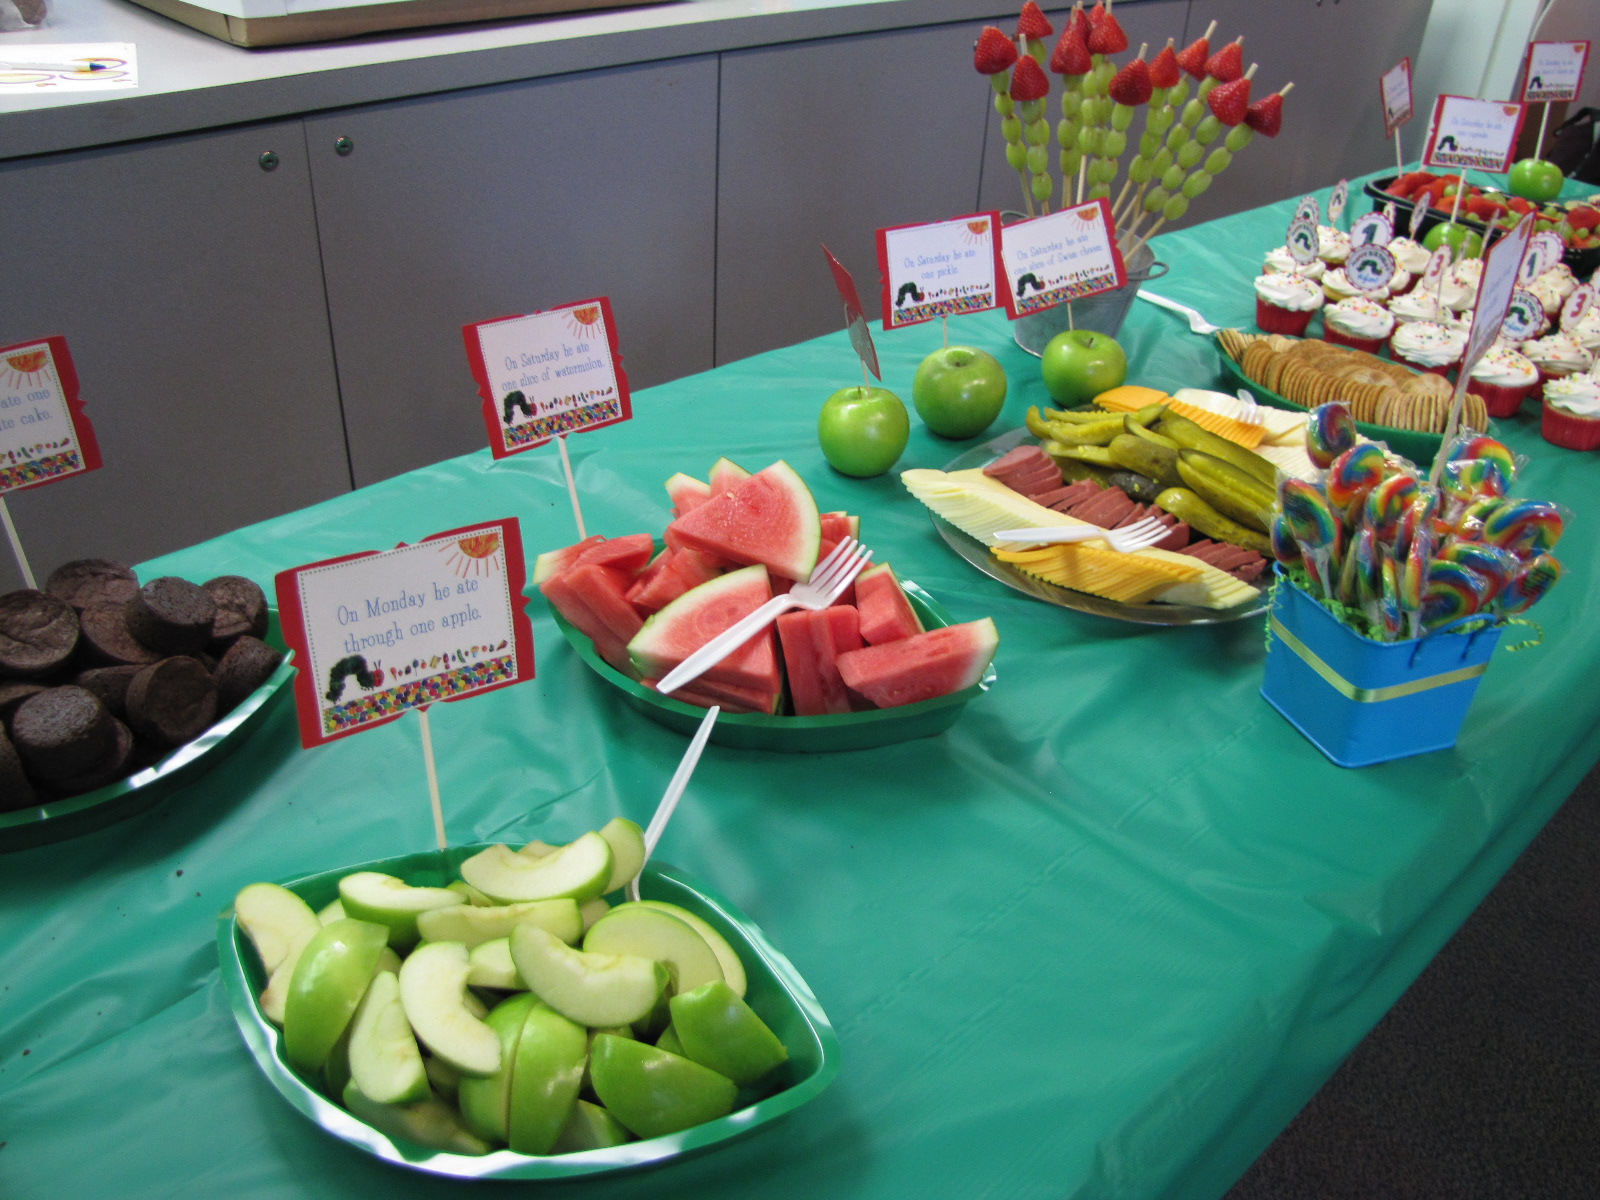
I loved how the food table came together!  I found a free downloaded the food labels from the Polka-dots and Puppies blog.  The cute little leave plates came from Oriential Trading Co. as did the lollipops, the table cloths, and the green gift boxes.
For chocolate cake I used brownie bites... it worked better that way since we were already having cup cakes...I guess we could have done chocolate cupcakes...but oh well...My good friend and AWESOME baker Patti at Tis So Sweet Bake Shoppe made the cupcakes for me.


For the Cherry Pie we did little cherry cheesecakes.

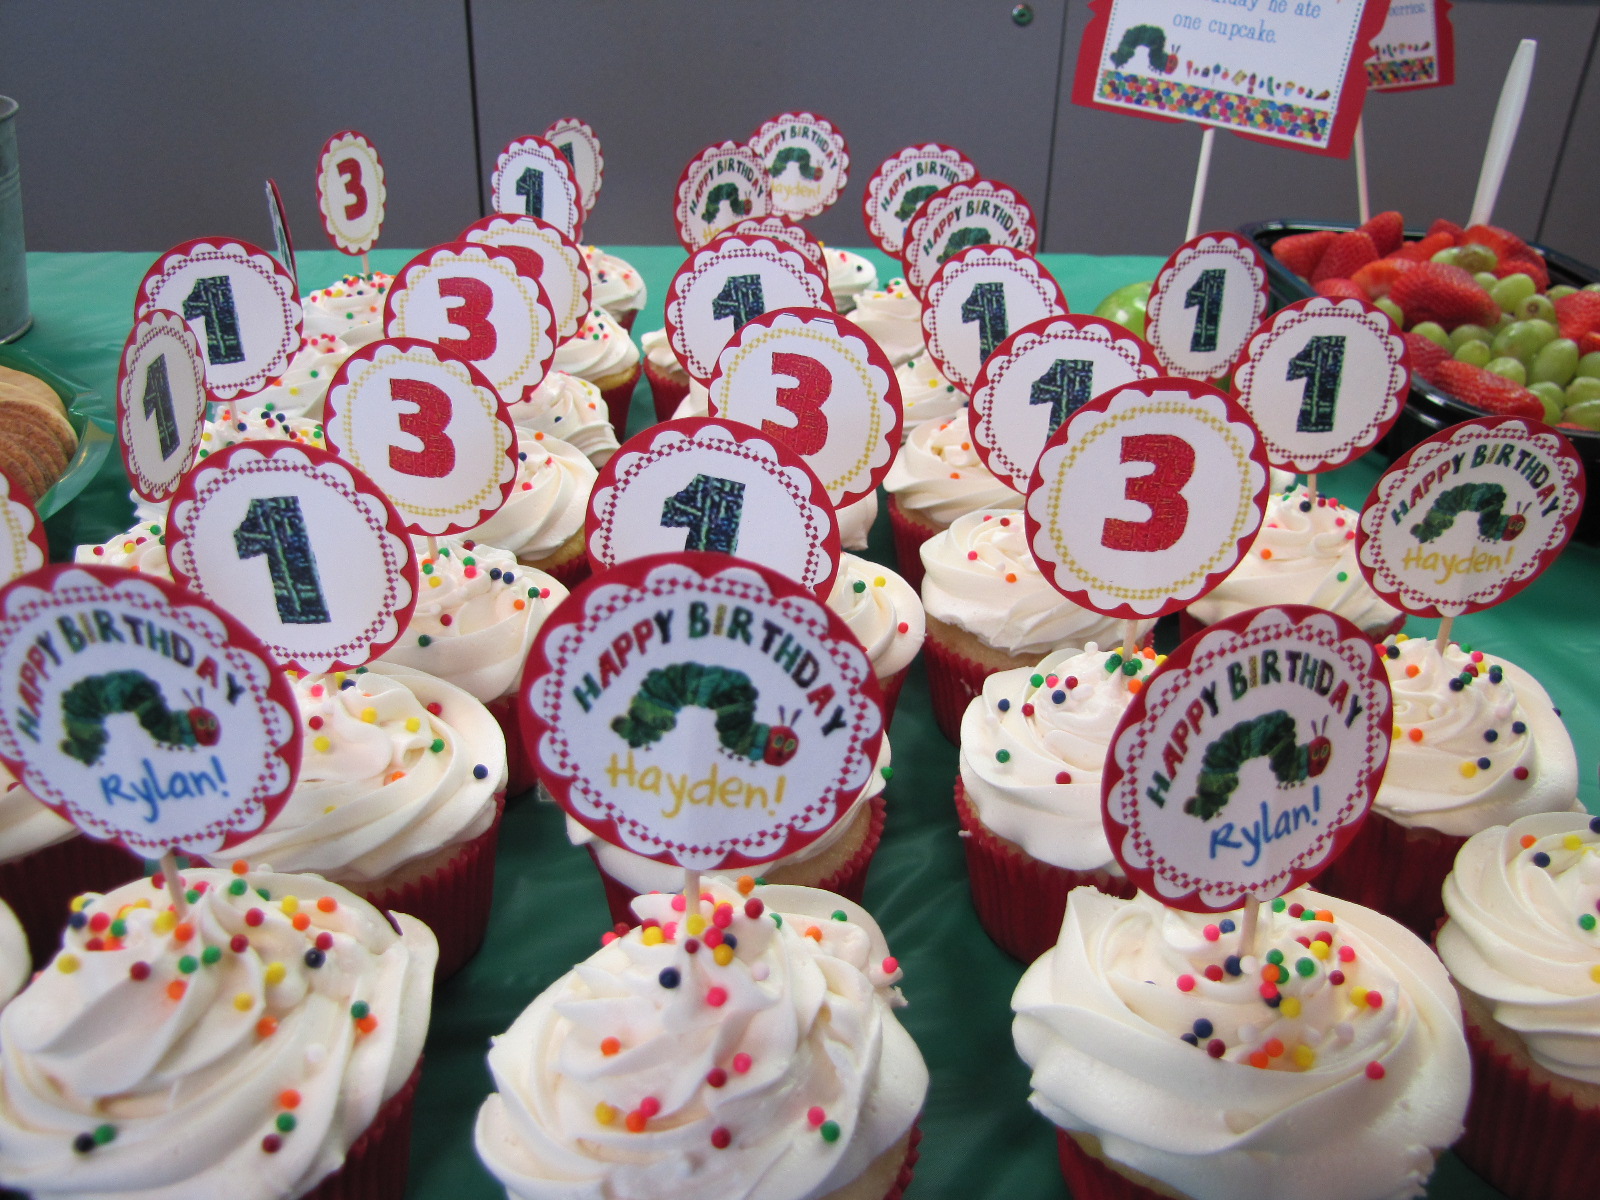
I also created the juice box and water bottle labels and cupcake picks...using the PNG graphics I found.  I can create them for you too! Or you can download the graphics linked above...and create them too!

The gift boxes I got super cheap at Oriental Trading and jsut glued a ribbon to them and created a label for them.


Our activities at the party included: reading The Very Hungry Caterpillar book.  Then we created our own Hungry caterpillars from green soda bottles...that I painted the inside of each bottle red days before the party.  I had all the materials from THIS tutorial available.  They came out very very cute...and the kids loved it!  Just have a helper on hand!  After the caterpillars were created we read the book again...with our caterpillars!

Above is the birthday girl...Below is the birthday boy.  I bought the iron on transfers from this Ebay seller and put them on white shirts we already had.  Easy, and cheaper than all the custom shirts you find on Etsy.


Friday, January 4, 2013

Painting With Fruit

Today the kids painted with fruit...it was an awesome little activity.  Even though the pictures look like it was a huge mess...it really wasn't all that messy!

Here is what you need:  
  • Fruit--I bought a small bag of frozen whole raspberries and one small frozen bag of whole blueberries.  You want to be sure they are not in syrup or any extra juices. 
  • Paper... You could tape down a few pieces to the table covering.  We got this super cool table top paper roll at Christmas it works great for both kiddos working at once!
  • I also always have those cheap plastic table covers on hand for projects such as these...you can get them at the Dollar Tree or after Holiday sales!  When the project is over you can just pitch the table cover...or wipe it down and use it again if the mess is not too crazy!
  • The last thing that is a necessity is some sort of smock for the kiddos...We have these Bumkins long sleeved bibs that work great for all sorts of messy things...but you could always take a plastic trash bag and make a poncho out of it by cutting holes in it for arms and head Just REALLY watch them with these as they could be a choking or suffocating hazard.  Or you could just strip them down and take baths after...
 
 We talked about the different colors that came from each fruit....
 ...and how we could make straight lines or curvy lines.  We dropped the fruit onto the paper to see what it would do...it made cool SPLAT marks.  We also tried to roll the raspberries to make a bumpy dotted pattern...it worked kind of.  We talked about how the raspberries had seeds in them and the blueberries were smooth inside when we squished them.
 It surprised me that Rylan (20 months old) was way more into painting than Hayden (3.5).  Hayden ate most the time.

But she did wonder what it would be like to paint with an orange...so we tried, but she decided it didn't work as well as the raspberries and blueberries.
 We talked about how the more we squished the fruit, the more juice came out and the darker our "paint" became.
 Hayden eventually got into the painting process...
I am letting the artwork dry and then I will see if there are any frame-able pieces of artwork!

Thursday, January 3, 2013

Wine Cork Board

So it has been awhile since I have posted a single thing....that does not mean I have not been creating....I have...but at such a speed that I would rather not take a break to blog about it.  But alas I am here for your viewing, reading, and overall educating pleasure!

I have been blessed by many things in my life...but one of recent is having an awesome group of neighbors.  There are five of us on our street that get together regularly every Friday evening...for "Wine Night".  This sounds much more sophisticated than what is actually it.  Sophisticated or not...it is always fun...and a cheap, safe, wonderful way to spend a Friday night out of the house.  After I put the kids to bed I head down the street with my bottle of wine in hand...

Not long after I joined this group of ladies I started pocketing the corks that accumulated each week.  I knew I could find something great to make of these corks.  I started a board on Pinterest of DIY Wine related crafts.

Well I finally got enough to create something great with them...(with the help of another cork hoarding neighbor...THANKS CHRISTY!!!)

Without further ado here it is my AWESOME Wine Cork Board: 


 The Frame:  I had originally thought I would re-purpose one or even two of those wooden trays that come with Melissa & Doug toys...I could stain it all pretty and such...but none of the trays I had really filled the space I planned on hanging the finished board.  On a side note...if anyone has any great ideas for those wooden trays let me know... I have a crap ton of them and I am not about to throw them away...I KNOW there is a use for them out there somewhere!

So I thought I'd find some sort of frame at my local craft store or something...but then I stumbled upon the clearance section at Kirkland's (a great home decor store).  They had this PERFECT 12 x 12, dark stained frame...with some silly sentiment in it about being a good daughter or something.  IT was $12!  I was sold.  My husband was watching in utter confusion when I came home and pulled out this nice new something or other to hang on the wall and I started tearing it apart.  We have been together long enough that heno longer asks questions.

I took the pretty picture out along with the glass and then put the cardboard backing back in place.  It worked perfectly.

Yeah up close you can totally see negative space between some of the corks...but I don't really care...no one is going to really be standing nose deep in my cork board...well maybe not all that often. Towards the end of the project it became the ultimate game of Tetris for a hot glue loving wino crafter.

Also I was going to add that if you are wanting to do this or any other wine cork craft...I have seen a box of wine corks you can buy at Target for $9.99.  It is in with the other decorative vase fillers.  I, however, prefer to earn my corks...it is more fun that way.  The corks I used are mostly from local wineries.  Because my neighbors always bring out the good stuff...the cheap-O Barefoot corks you see on the board are my contribution.  I am a $6 bottle kind of girl. :)

Soon I will be adding a post of all the handmade Holiday gifts I made this year...included are those super cute wine cork reindeer you see all over Pinterest.  I will link it as soon as I finish that post!

Thursday, February 23, 2012

An Awesome Lampshade!

I have been on a bit of a hiatus lately, but that does not mean I have not been busy creating...I just have been SO busy creating that I have not gotten things posted for all FIVE of my loyal followers.

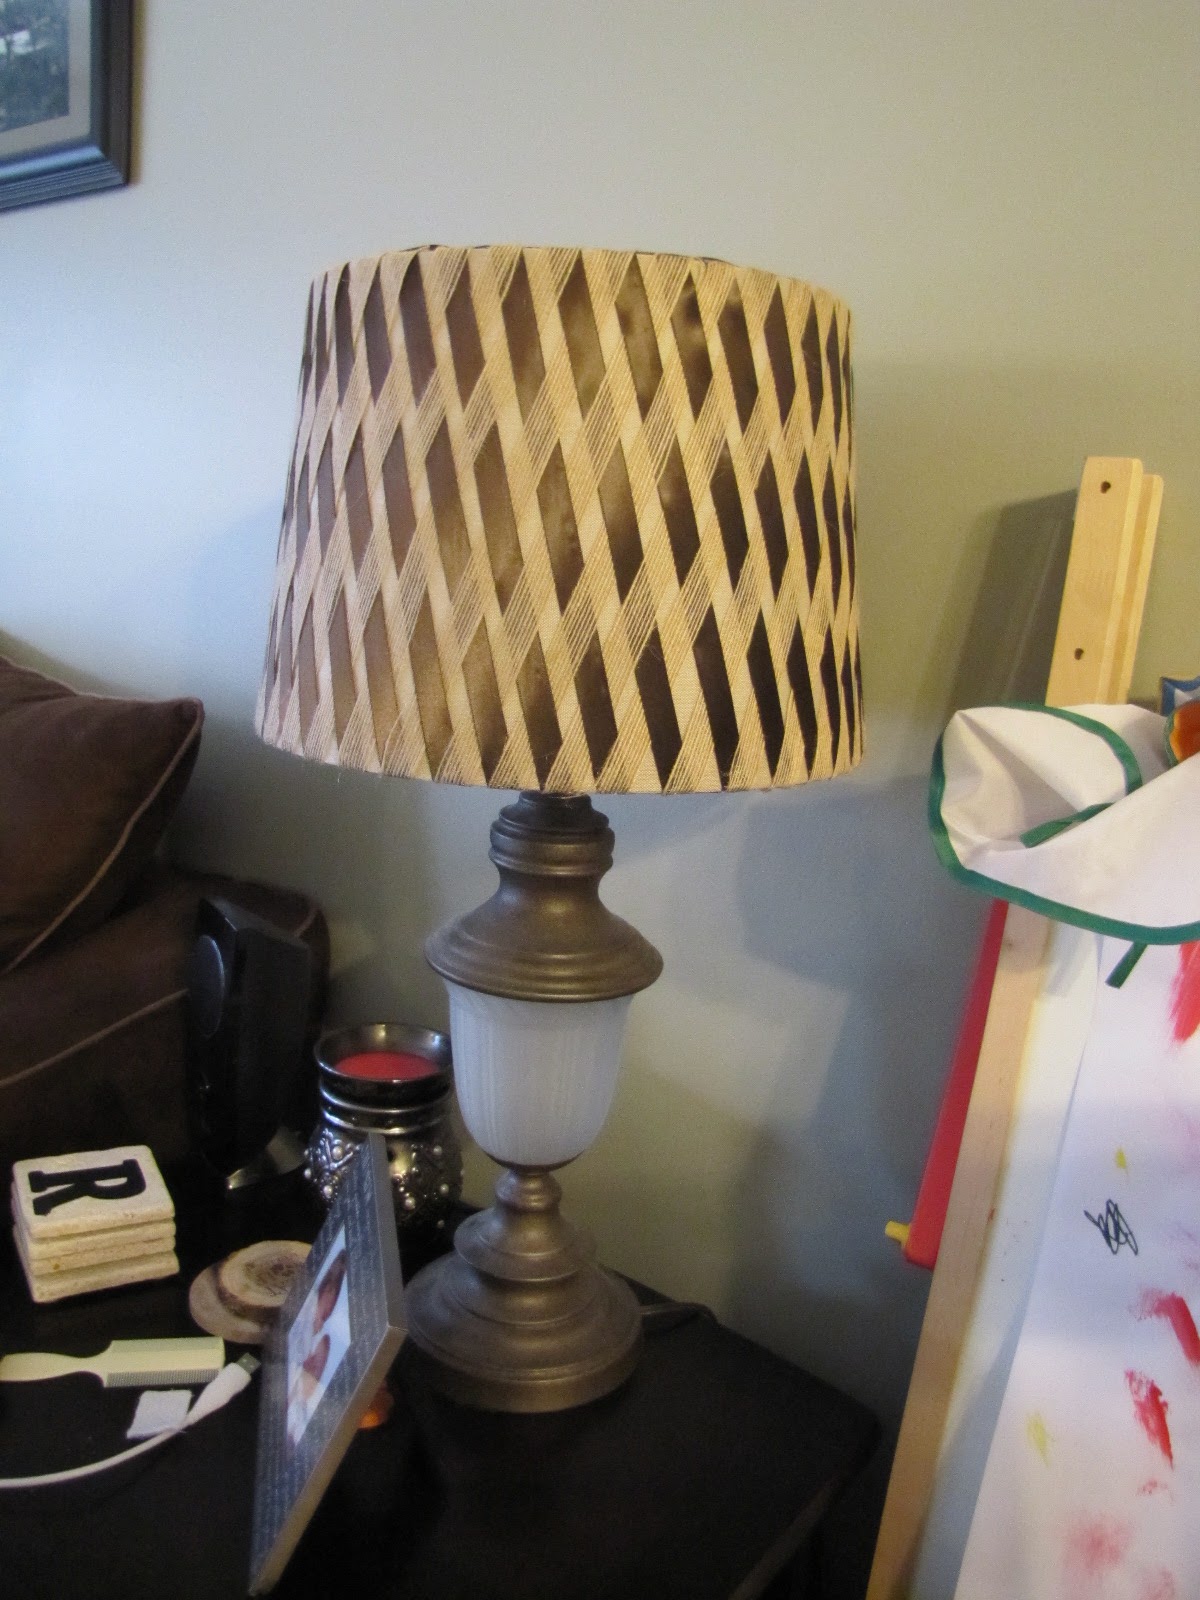
I ran across the inspiration for this lampshade on Pinterest once again (am quite addicted). The tutorial was put out by Midwest Living and you can follow along with it here. It was such an easy tutorial that just as soon as I finished reading it I was out the door to get my supplies.  

Which included: 
  • a $15 10in drum lampshade (from Walmart), 
  • two rolls each of two contrasting ribbons (5/8th thick)
...I used a chocolate satin ribbon and a burlap looking ribbon.  ($1.99 per roll at Walmart)
  • hot glue (I had)
  • Lamp (I had)


It changed the whole look of the lamp...I like it a lot...it is a lot better than the dingy old lady shade we had there before!

Thursday, February 16, 2012

Awesome Dinosaur Tails!


There are a couple of dino-lovin' two year old boys I know that just had a birthday.  Their party is this weekend...so I HAD to find something Awesomely-Dino to make for them!  I searched Pinterest with the search term "Dinosaur" and came across this awesome tutorial to make these awesomely cute and simple dinosaur tails!  They are exactly what I was looking for!


Jessica over at Running With Scissors did a fabulous job walking me through this project!  If you have even the most basic sewing skills you too could make one of these for a Dino-loving little one in your life!

It only took me about two hours to do both of them...If you are a local mama and you want one for your little guy or girl...get in touch with me...we could totally work something out!


I happen to have two toddlers at my house today that were MORE than willing to show off how fun these things are!


 Thanks for looking!

Wednesday, February 15, 2012

Awesome MilkCaps Alpha Matching!

Some of you have eagerly been waiting to see why on earth I was having you save milk caps... Over the weekend we FINALLY hit our goal of 26 milk caps (but I still would like MANY more)!  So last night I got to work on the game board.
Here is the final result:


 It is pretty self explanatory...but I will explain it anyway...:)  It is a matching game for the kids to learn to recognize the letters of the alphabet (capital to capital, lower case to lower case, then when they are ready lower case to upper case). 


Step One:  Ask your family and friends to start collecting milk caps for you.  The ones without a label on them work best.  The labeled ones for me were a huge pain to get them clean.  I did not even end up using them.  If that is all your family uses then you could always put your own label over top of it and it would work fine.  I used all colors with not particular pattern...you could do vowels one color and consonants in another.
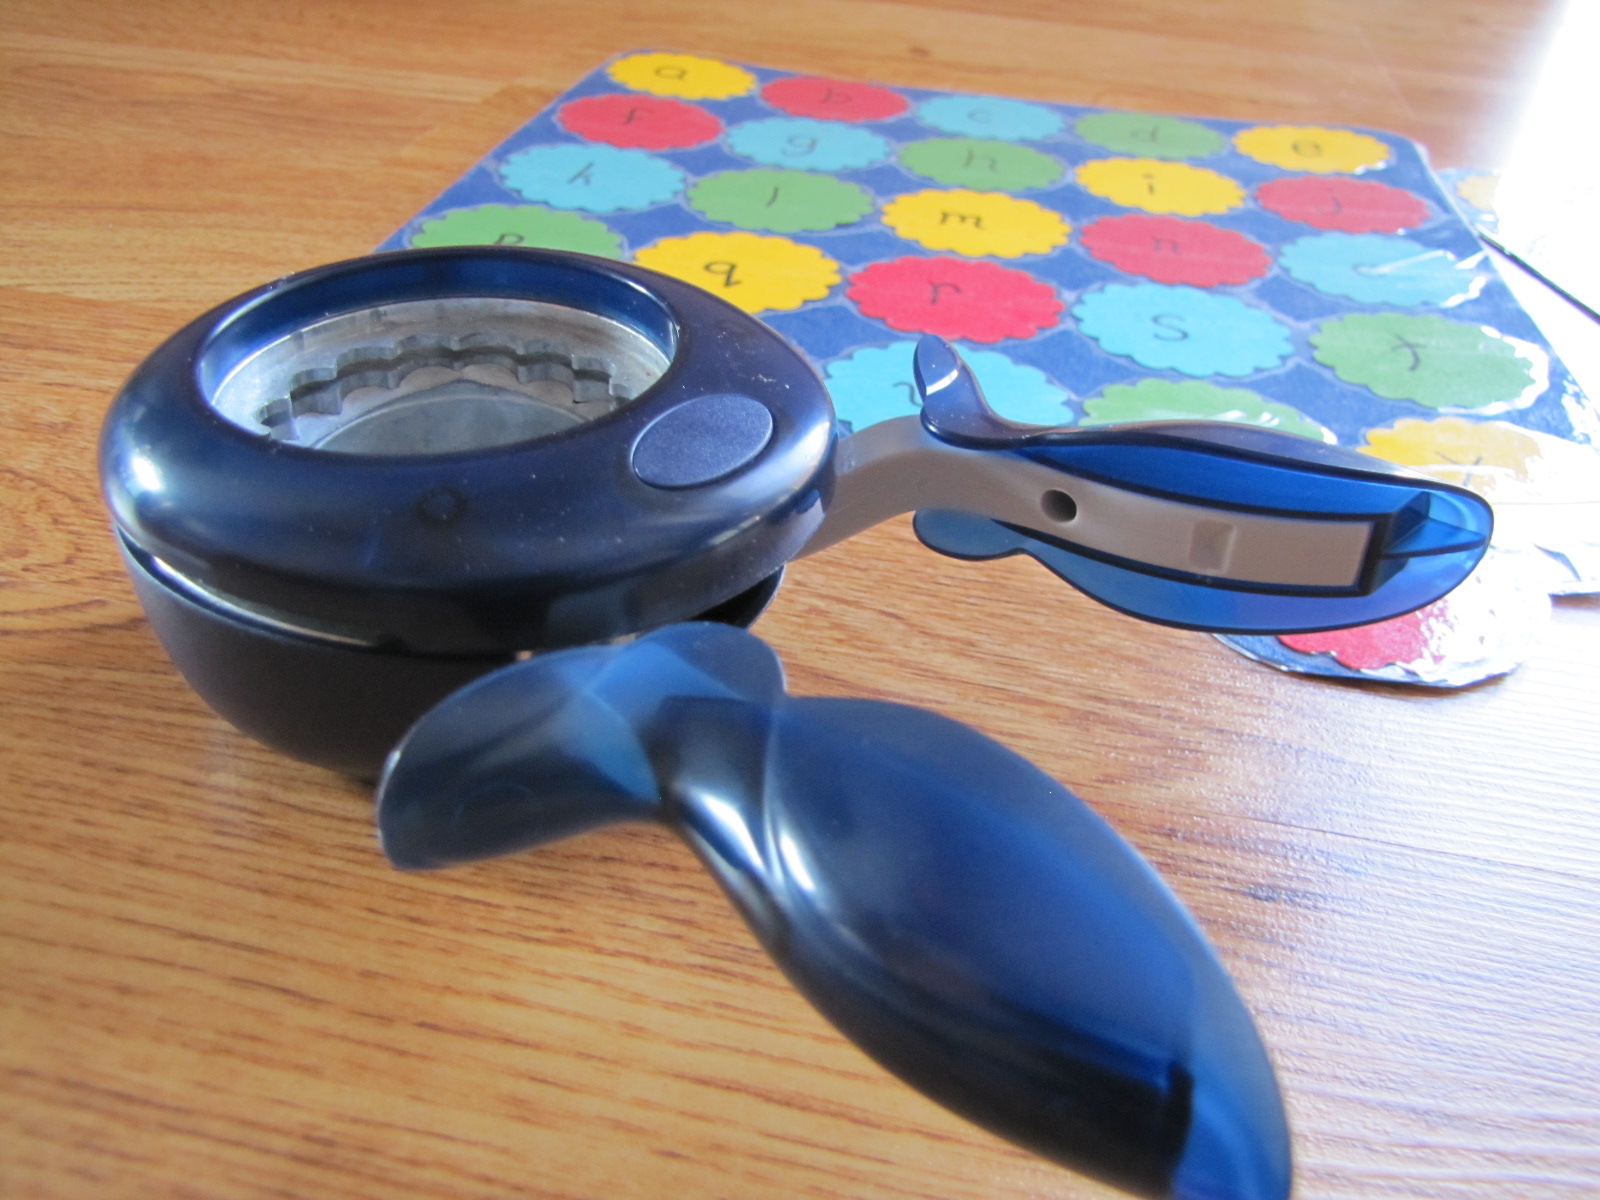
 Step Two: Cut circles about 2in in diameter.  I used my Cricut at first, but then decided this Fiskers paper punch was cuter.  Again my colors have no reasoning behind them...My daughter is only 2.5 so vowels are not a priority right now.  I used a Sharpie to write the letters on each little circle and each milk cap. 


 Step Three: I used double sided tape to stick each circle in place on the 12 x12 piece of cardstock.  I ended up cutting it down a bit after they were all placed.  You could also space them out a bit more in order to allow room for the "game board"  to fold in half for storage.  I forgot I was going to do that so mine does not fold in half.


Step Four: I "Laminated" the front and back with packing tape.  I call it the poor man's lamination...it works just fine for me!
 I made two "game boards".  One uppercase and one lowercase...upon reflection I am sure I could have put the lowercase letters on the back of the uppercase game board (less supplies, less to store, less to lose).


I love how it turned out!  Thank you to all of you who saved milk caps for me...keep saving them as I still need to make the lower case set of milk caps.  And I want to make a whole other set of this for a friend!


Wednesday, February 8, 2012

Crockpot Wednesday

This just went in:


Brown Sugar Chicken 
  • Boneless, Skinless Chicken Breasts, I did 4
  • 1 cup Brown Sugar
  • 1/4 cup Sprite (I will add this once I add everything else to the crockpot)
  • 2/3 cup Vinegar
  • 3 cloves smashed and chopped garlic
  • 2 Tablespoon Soy Sauce
  • 1 Teaspoon Black Pepper
It smelled pretty potent with the vinegar, garlic, and soy sauce...I hope it mellows out a bit as it cooks
I put it on high at about 2pm...after I think it is done I will turn it to warm...the recipe says 3-4 hours on high.  This is another one that you can put all the ingredients (EXCEPT the sprite) into a gallon sized freezer bag as a "MAKE AHEAD MEAL".


I will serve it with rice...in my Handy Dandy Rice Cooker!


This recipe is a lot like last Wednesday's Crockpot meal Honey Garlic Chicken.  But we LOVED last week's so I decided to do this one today and we will see which one wins out.  Last weeks is going to be VERY hard to beat though.  It was amazing and a bit healthier, being that it was made with natural honey and not brown sugar and sprite!  Ha! 


I will update you on the final outcome!