Shabby Miss Jenn

Thursday, February 23, 2012

An Awesome Lampshade!

I have been on a bit of a hiatus lately, but that does not mean I have not been busy creating...I just have been SO busy creating that I have not gotten things posted for all FIVE of my loyal followers.

I ran across the inspiration for this lampshade on Pinterest once again (am quite addicted). The tutorial was put out by Midwest Living and you can follow along with it here. It was such an easy tutorial that just as soon as I finished reading it I was out the door to get my supplies.  

Which included: 
  • a $15 10in drum lampshade (from Walmart), 
  • two rolls each of two contrasting ribbons (5/8th thick)
...I used a chocolate satin ribbon and a burlap looking ribbon.  ($1.99 per roll at Walmart)
  • hot glue (I had)
  • Lamp (I had)


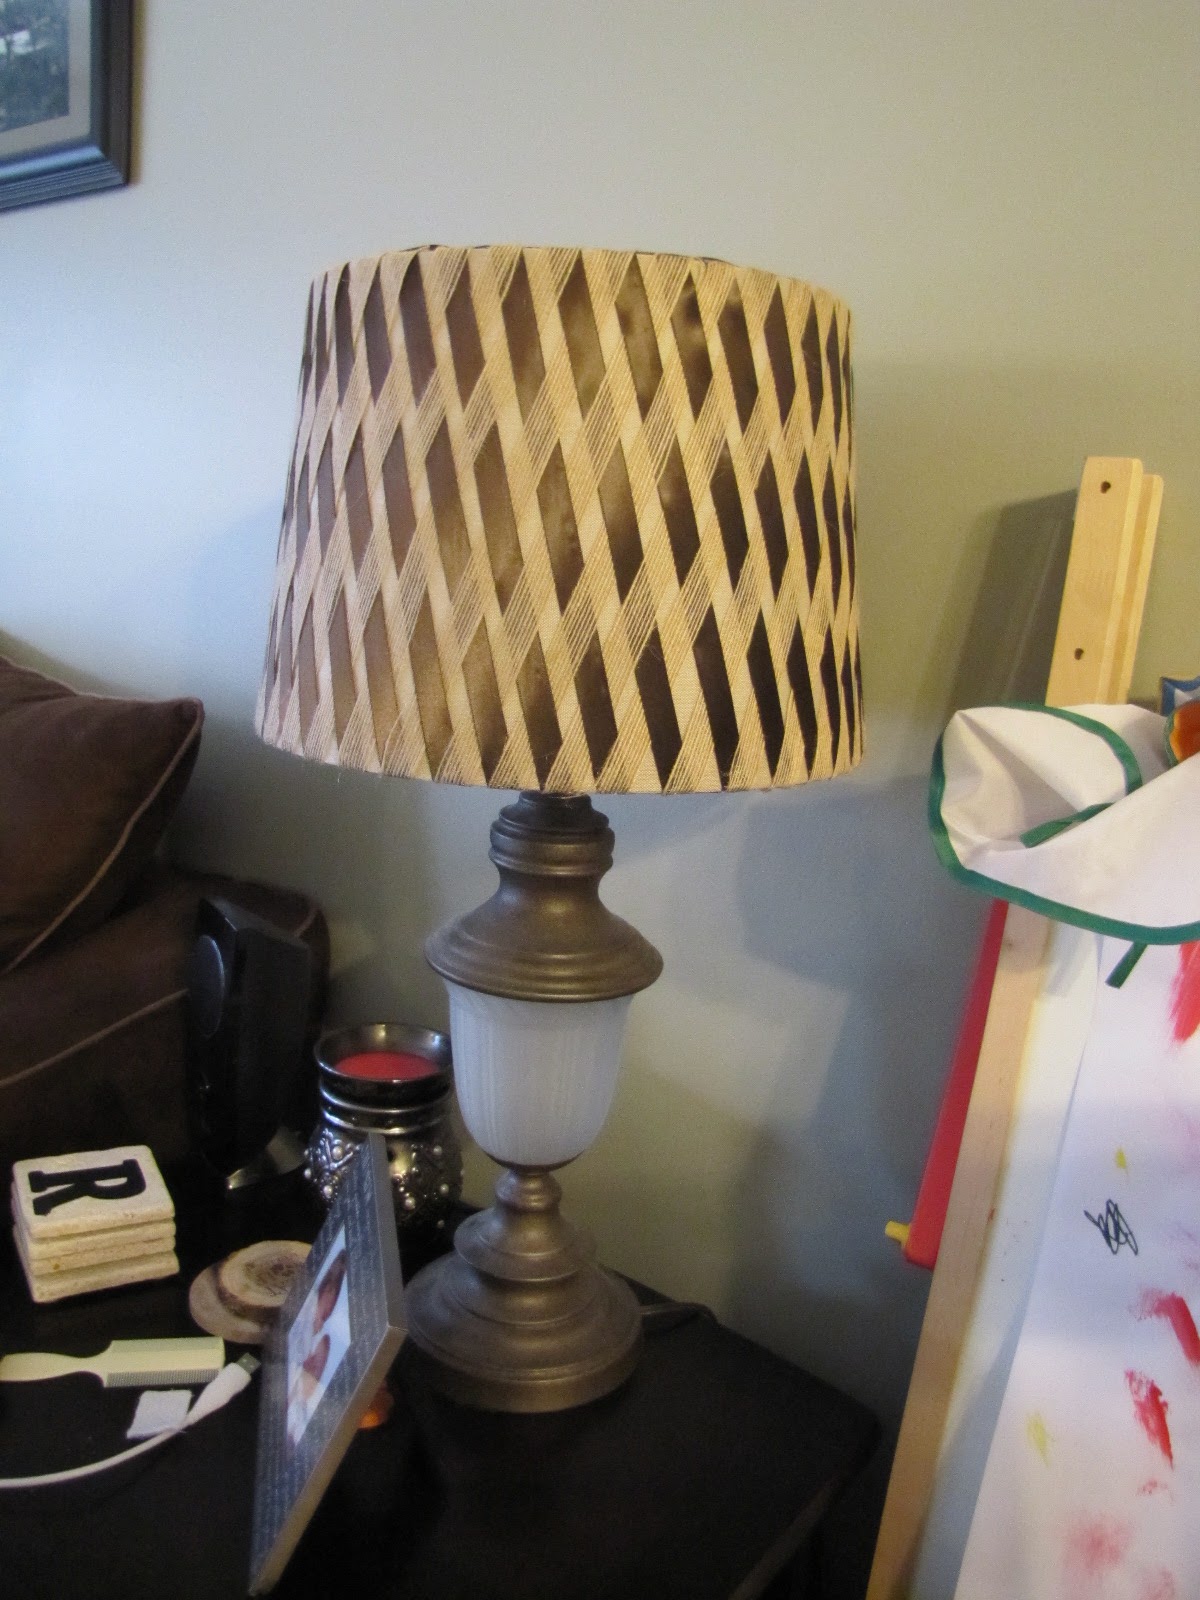
It changed the whole look of the lamp...I like it a lot...it is a lot better than the dingy old lady shade we had there before!

Thursday, February 16, 2012

Awesome Dinosaur Tails!


There are a couple of dino-lovin' two year old boys I know that just had a birthday.  Their party is this weekend...so I HAD to find something Awesomely-Dino to make for them!  I searched Pinterest with the search term "Dinosaur" and came across this awesome tutorial to make these awesomely cute and simple dinosaur tails!  They are exactly what I was looking for!


Jessica over at Running With Scissors did a fabulous job walking me through this project!  If you have even the most basic sewing skills you too could make one of these for a Dino-loving little one in your life!

It only took me about two hours to do both of them...If you are a local mama and you want one for your little guy or girl...get in touch with me...we could totally work something out!


I happen to have two toddlers at my house today that were MORE than willing to show off how fun these things are!


 Thanks for looking!

Wednesday, February 15, 2012

Awesome MilkCaps Alpha Matching!

Some of you have eagerly been waiting to see why on earth I was having you save milk caps... Over the weekend we FINALLY hit our goal of 26 milk caps (but I still would like MANY more)!  So last night I got to work on the game board.
Here is the final result:


 It is pretty self explanatory...but I will explain it anyway...:)  It is a matching game for the kids to learn to recognize the letters of the alphabet (capital to capital, lower case to lower case, then when they are ready lower case to upper case). 


Step One:  Ask your family and friends to start collecting milk caps for you.  The ones without a label on them work best.  The labeled ones for me were a huge pain to get them clean.  I did not even end up using them.  If that is all your family uses then you could always put your own label over top of it and it would work fine.  I used all colors with not particular pattern...you could do vowels one color and consonants in another.
 Step Two: Cut circles about 2in in diameter.  I used my Cricut at first, but then decided this Fiskers paper punch was cuter.  Again my colors have no reasoning behind them...My daughter is only 2.5 so vowels are not a priority right now.  I used a Sharpie to write the letters on each little circle and each milk cap. 


 Step Three: I used double sided tape to stick each circle in place on the 12 x12 piece of cardstock.  I ended up cutting it down a bit after they were all placed.  You could also space them out a bit more in order to allow room for the "game board"  to fold in half for storage.  I forgot I was going to do that so mine does not fold in half.


Step Four: I "Laminated" the front and back with packing tape.  I call it the poor man's lamination...it works just fine for me!
 I made two "game boards".  One uppercase and one lowercase...upon reflection I am sure I could have put the lowercase letters on the back of the uppercase game board (less supplies, less to store, less to lose).


I love how it turned out!  Thank you to all of you who saved milk caps for me...keep saving them as I still need to make the lower case set of milk caps.  And I want to make a whole other set of this for a friend!


Wednesday, February 8, 2012

Crockpot Wednesday

This just went in:


Brown Sugar Chicken 
  • Boneless, Skinless Chicken Breasts, I did 4
  • 1 cup Brown Sugar
  • 1/4 cup Sprite (I will add this once I add everything else to the crockpot)
  • 2/3 cup Vinegar
  • 3 cloves smashed and chopped garlic
  • 2 Tablespoon Soy Sauce
  • 1 Teaspoon Black Pepper
It smelled pretty potent with the vinegar, garlic, and soy sauce...I hope it mellows out a bit as it cooks
I put it on high at about 2pm...after I think it is done I will turn it to warm...the recipe says 3-4 hours on high.  This is another one that you can put all the ingredients (EXCEPT the sprite) into a gallon sized freezer bag as a "MAKE AHEAD MEAL".


I will serve it with rice...in my Handy Dandy Rice Cooker!


This recipe is a lot like last Wednesday's Crockpot meal Honey Garlic Chicken.  But we LOVED last week's so I decided to do this one today and we will see which one wins out.  Last weeks is going to be VERY hard to beat though.  It was amazing and a bit healthier, being that it was made with natural honey and not brown sugar and sprite!  Ha! 


I will update you on the final outcome!

An Awesome Outfit for EVERY Occasion!

 In the past few months I have been really getting into applique shirts...they are quick easy, and oh so Awesomely cute!   I have been lucky enough to have a few friends even ask me to do some custom work for their little ones!  Thank you to all who have had the faith in my sewing skills!  You are providing me with some really great motivation for my skill building!  I LOVE it!


The first project is for Little D...She is having a Minnie Mouse themed 2nd birthday party.  Her mama sent me a photo of a shirt she had found and liked...I took the photo as inspiration and flew with it!  This was a super fun little project!  The shirt and leggings are factory made, I added the flair!

Here is my own little model trying on D's outfit...her little belly is a bit too big for the shirt!
 I LOVE, LOVE, LOVE Ruffles!!!!  Some day soon I am getting a super nifty ruffler foot for my sewing machine.

This little snowgirl onesie was meant for little M, but she grew faster than I got around to making it...

 I made several of these little turkey dresses around Thanksgiving.  I LOVE how they turned out!  Again the shirt was factory made the skirt and turkey were added by me!  Some had three layered skirt, some had and A-line shirt, and some had just a ruffle at the bottom of the shirt.
  Again my little model was wearing one of the finished products...it was meant for an 18 month old  that would be why it looks so short on her! :)


And I also made several of these Turkey shirts too!  I LOVED how they turned out...little feather butts!

Getting ready for Valentine's Day!  Here are a handful of shirts that were made for several different little ones to help them celebrate the day!


 Here is yet another Birthday girl outfit!  Little A is turning 1 and she is having an awesome Owl themed Her mama sent me this photo of the party supplies she had purchased to set the theme...and I ran with it!  


This dress was so so so fun to make!  I learned how to make my own bias tape for this dress....I will NEVER buy bias tape again...For those non-sewers out there bias tape is the term used for the trim around the hem of each layer of this skirt.  It is a super cute, easy, a professional way of finishing an edge...and now I can do it with fabric I have on hand!  Here is the link to the Scientific Seamstress and her tutorial on making your own bias tape.  You can see on the Turkey dresses above that I did not use the bias tape then...it would have saved me a lot of time and been a cute addition to the dresses...like I said I am building my skills and am loving every minute of it!


And now I have fallen in love with the idea of a ruffler foot for my sewing machine!  Oh I can't wait to play with that!!!  Thanks for looking!

Monday, February 6, 2012

An Awesome Felt Made Valentine's Day

I put together a couple of Valentines decorations using inexpensive felt...the two projects all together were maybe $20.  And again both were Pinterest finds...And both have tutorials that I will link for you!

The first AWESOME project is this felt heart wreath.    It was fairly easy, but a little time consuming...Cutting out all the felt circles was the most daunting task of it.  But I used a rotary cutter meant for paper crafts and it made it all go a bit faster.  The circles were 4inches in diameter. 

 I used around 200 stick pins and 3/4 of a yard of pink felt and 1/4 of yard of red...though I didn't use all the red. 

 I couldn't find a Styrofoam heart form larger than 9inches at any of our local stores so I bought a large disk of Styrofoam at Micheal's and cut a heart shape and then cut the middle of the heart shape out to make it a "wreath".  When cutting Styrofoam I have found a pumpkin carving knife to work perfectly!
 Here is the Link to the AWESOME tutorial from The Idea Room that I followed to make the felt heart wreath.


The other Awesome Valentine Felt project I did was this WAY cute and WAY easy heart garland.  It is made from 1 9x12 sheet of red felt and 1 9x12 sheet of pink felt, 1/2 inch white puff balls, and simple cotton thread.
   Pin It
 If I were to do it again I would change two things...I would use that stiff felt you see in the felt isle...It would help the hearts keep their shape while hanging...or as my friend Laura pointed out...you could always try spraying it with startch.  The second thing I would change is the size of puff balls...I would use an inch size...I think it would just add more to the garland...But since it was my hubby who picked up the supplies on his way home from work I should be impressed that he was willing AND found all the correct supplies!  Love you Honey!
I love how it looks and LOVE how fun and easy it was...here is the tutorial...it is in Japanese I believe but the pictures explain it all!

Wednesday, February 1, 2012

Crockpot Wednesday

Pin It
It is Wednesday and that means it is a crock pot day in our house....This just went in....

Honey Garlic Chicken

Boneless, Skinless Chicken Breast, I used 4
3 Garlic Cloves, smashed and chopped
1 Teaspoon Dried Basil
1/2 cup Soy Sauce
1/2 cup Ketchup
1/3 cup Honey-(I had the luxury of using fresh honey from my friend Laura!)
I put it on low and when I think it is done I will switch it to "warm"...The recipe says 3-4 hours on high.
 
I will serve it with rice using my Handy Dandy Rice cooker. YUM!
 
This can also be mixed ahead of time and thrown into a gallon freezer bag.  When you are ready to cook it just throw it all into the crockpot...You can leave out the chicken from the mix and heat it in the microwave and then add it to the crockpot...frozen chicken in the crockpot is not recommended though I do it maybe too often. 

This was the final outcome:
Very Juicy chicken, with a nice dressing from the juices left in the crockpot.  

It was enjoyed by all!  It even made leftovers that warmed up nicely.

OVER ALL Review:  So Yummy, So Easy, and Very economical!  A definite repeat in our house!